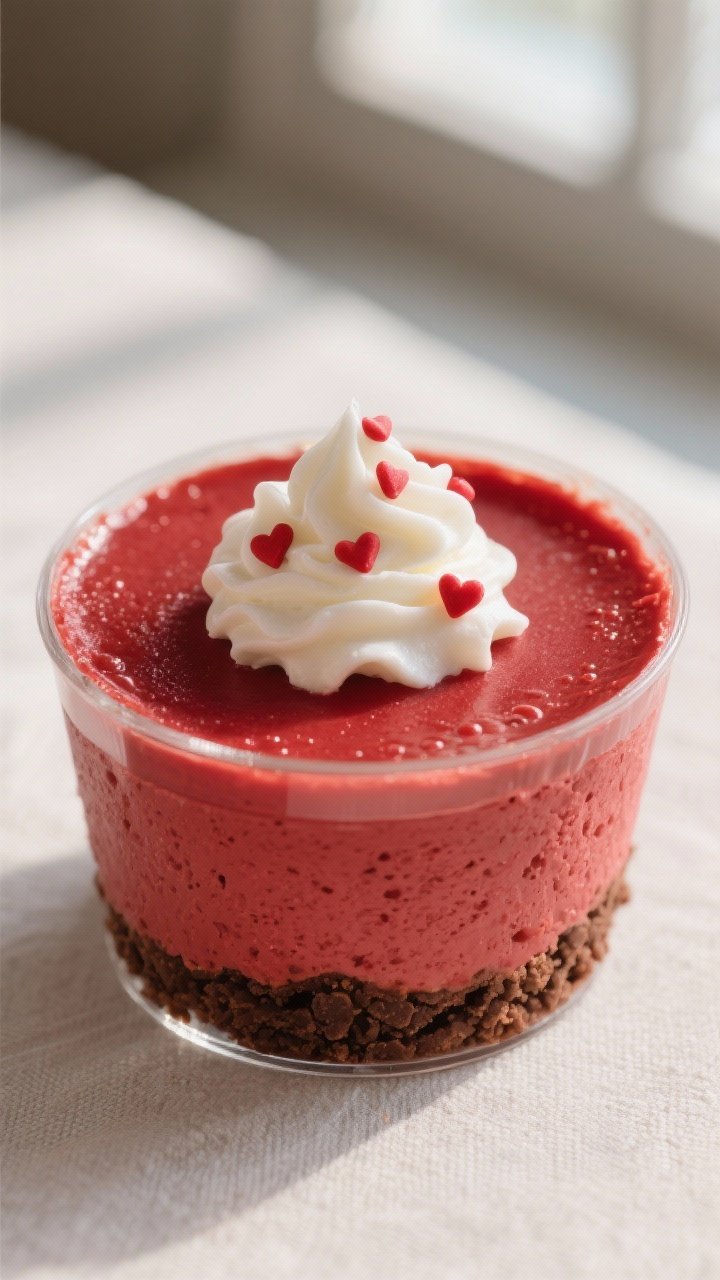
Valentine’s Day calls for something sweet, special, and just a little dramatic—and these red velvet cheesecake cups check every box. They’re creamy, velvety, and full of that signature cocoa-kissed red velvet flavor. Served in individual cups, they look fancy but are easy enough to make on a weeknight.
No springform pan, no water bath, no stress. Just a smooth, tangy cheesecake filling layered with a buttery cookie crumb crust, topped with whipped cream and a few festive sprinkles.
What Makes This Recipe So Good
- Individual servings: These cups look polished and make portioning a breeze. Perfect for date night or a small gathering.
- No-bake option: The cheesecake filling sets up in the fridge, so you don’t need to turn on the oven unless you’re toasting the crust.
- Classic red velvet flavor: A touch of cocoa and vanilla gives the cheesecake a subtle chocolate note without overpowering it.
- Make-ahead friendly: You can prep these the day before and add toppings just before serving.
- Customizable: Use Oreo or graham crumbs, add a swirl of chocolate, or top with berries.
It’s hard to go wrong.
What You’ll Need
- For the crust:
- 1 1/2 cups chocolate cookie crumbs (Oreo crumbs or chocolate wafer crumbs)
- 5 tablespoons unsalted butter, melted
- 1 tablespoon granulated sugar (optional, for extra sweetness)
- Pinch of salt
- For the red velvet cheesecake filling:
- 16 ounces cream cheese, softened (full-fat for best texture)
- 3/4 cup granulated sugar
- 2/3 cup sour cream (or Greek yogurt for a tangier bite)
- 1/3 cup heavy cream
- 2 teaspoons vanilla extract
- 1 1/2 tablespoons unsweetened cocoa powder
- 1 tablespoon lemon juice (or 1 teaspoon white vinegar) for a gentle tang
- Red gel food coloring, to your desired shade (start with 1/2 teaspoon)
- Pinch of salt
- For topping:
- Whipped cream (homemade or store-bought)
- Chocolate shavings, sprinkles, or fresh berries
- Optional: melted white chocolate for drizzling
- Tools:
- 8–10 small cups or jars (6–8 ounces each)
- Mixing bowls and electric mixer
- Rubber spatula and small spoon
- Piping bag (optional, for neat filling)
How to Make It
- Make the crust: Stir cookie crumbs, melted butter, sugar, and a pinch of salt until the mixture looks like wet sand and holds together when pressed.
- Press into cups: Spoon 2–3 tablespoons of crust mixture into each cup. Press down firmly with the back of a spoon or a small flat-bottomed glass to create an even layer.
- Optional quick set: For a sturdier crust, bake the empty cups on a tray at 350°F (175°C) for 6–7 minutes, then cool. Or chill the crusts in the fridge for 15 minutes while you make the filling.
- Beat the cream cheese: In a large bowl, beat softened cream cheese on medium speed until smooth and fluffy, about 2 minutes.
Scrape the bowl so there are no lumps.
- Add sugar and cocoa: Mix in the granulated sugar, cocoa powder, and salt until fully combined and silky.
- Blend in sour cream and heavy cream: Add the sour cream and heavy cream. Beat on low until smooth and thick, about 1 minute.
- Flavor and color: Add vanilla and lemon juice. Then add red gel food coloring a little at a time until you reach a deep, vibrant red.
Gel works best—liquid coloring can water the mixture down.
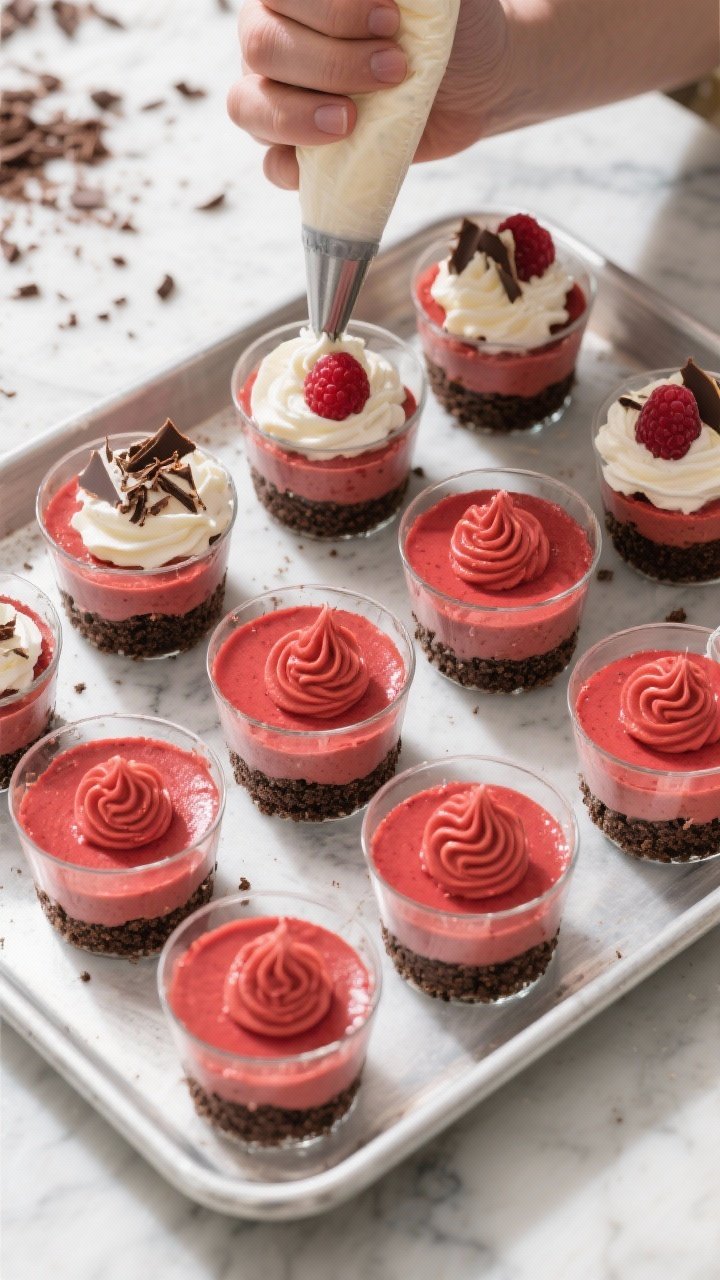
- Fill the cups: Spoon or pipe the red velvet cheesecake mixture over the crusts, filling each cup nearly to the top. Tap the cups gently on the counter to release air bubbles.
- Chill to set: Cover and refrigerate for at least 4 hours, or overnight for the cleanest texture. The filling should be firm but creamy.
- Finish and serve: Top with whipped cream, a drizzle of melted white chocolate, sprinkles, or fresh raspberries.
Serve chilled.
Keeping It Fresh
- Refrigeration: Keep cups covered and refrigerated. They hold well for 3–4 days.
- Toppings later: Add whipped cream and fruit right before serving so they stay fresh and crisp.
- Freezing: You can freeze the cups (without whipped cream) for up to 1 month. Wrap tightly.
Thaw in the fridge overnight before serving.
- Avoid separation: Don’t leave the cups at room temperature for more than 2 hours to maintain texture and food safety.
Why This is Good for You
- Reasonable portions: Individual cups naturally help with portion control, making it easier to enjoy dessert without going overboard.
- Protein and calcium: Cream cheese and sour cream offer a small boost of protein and calcium.
- Balanced sweetness: The tang from the sour cream and lemon keeps the dessert from tasting overly sweet, so a smaller serving feels satisfying.
- Customization: You can lighten it up with Greek yogurt, use reduced-fat cream cheese, or top with berries for extra fiber.
Common Mistakes to Avoid
- Using cold cream cheese: Cold cream cheese leads to lumps. Soften it at room temperature for 45–60 minutes before mixing.
- Overmixing after adding cream: Too much beating can incorporate excess air and loosen the filling. Mix just until smooth.
- Too much liquid food coloring: Liquid dye can thin the batter.
Use gel coloring for a vibrant red without sacrificing texture.
- Skipping the chill time: The filling needs time to set. Cutting the chill short can make the cups feel loose and messy.
- Forgetting the salt: A pinch of salt sharpens the chocolate-cocoa flavor and balances the sweetness.
Alternatives
- Crust swaps: Try graham crackers for a classic flavor, Biscoff cookies for a caramel note, or gluten-free chocolate cookies for a GF option.
- Lighter filling: Use reduced-fat cream cheese and Greek yogurt. The texture will be slightly softer but still delicious.
- Chocolate swirl: Fold in 1/4 cup melted and cooled dark chocolate for a marbled effect.
- Berry layer: Add a thin layer of raspberry jam over the crust before piping in the cheesecake.
- Mini size: Make shooters in 2–3 ounce cups for parties.
Great for dessert samplers.
- Flavor twist: Add 1/2 teaspoon almond extract for a sweet, bakery-style aroma.
FAQ
Can I make these a day ahead?
Yes. In fact, they set best when chilled overnight. Just add whipped cream and toppings right before serving.
Do I have to bake the crust?
No.
The melted butter will firm up the crumbs in the fridge. Baking the crust for a few minutes just makes it a bit crisper.
What if I don’t have red gel food coloring?
You can use liquid red food coloring, but use it sparingly to avoid thinning the filling. Start with 1 teaspoon and add as needed, or simply enjoy them as “cocoa velvet” cheesecake cups without dye.
Can I use mascarpone instead of cream cheese?
You can swap in up to half mascarpone for a silkier texture.
If you use all mascarpone, the filling may be softer, so chill it longer.
How can I make them less sweet?
Reduce the sugar in the filling to 1/2 cup and skip the sugar in the crust. Topping with tart berries also balances sweetness.
What’s the best way to get a smooth filling?
Make sure the cream cheese is fully softened, sift the cocoa powder to avoid clumps, and scrape down the bowl several times while mixing.
Can I turn this into a baked version?
Yes. Divide the batter among oven-safe ramekins, place on a tray, and bake at 300°F (150°C) for 15–18 minutes until just set with a slight wobble.
Cool, then chill before serving.
Final Thoughts
Valentine’s Day red velvet cheesecake cups bring together everything you want in a romantic dessert: striking color, creamy texture, and familiar flavors that feel special. They’re simple to assemble, easy to customize, and perfect for sharing. Make them the night before, pull them from the fridge, and finish with a swirl of whipped cream.
It’s a low-effort, high-reward treat that makes any celebration feel a little more memorable.

Valentine’s Day Red Velvet Cheesecake Cups - Creamy, Festive, and Easy
Ingredients
- For the crust: 1 1/2 cups chocolate cookie crumbs (Oreo crumbs or chocolate wafer crumbs)
- 5 tablespoons unsalted butter, melted
- 1 tablespoon granulated sugar (optional, for extra sweetness)
- Pinch of salt
- For the red velvet cheesecake filling: 16 ounces cream cheese, softened (full-fat for best texture)
- 3/4 cup granulated sugar
- 2/3 cup sour cream (or Greek yogurt for a tangier bite)
- 1/3 cup heavy cream
- 2 teaspoons vanilla extract
- 1 1/2 tablespoons unsweetened cocoa powder
- 1 tablespoon lemon juice (or 1 teaspoon white vinegar) for a gentle tang
- Red gel food coloring, to your desired shade (start with 1/2 teaspoon)
- Pinch of salt
- For topping: Whipped cream (homemade or store-bought)
- Chocolate shavings, sprinkles, or fresh berries
- Optional: melted white chocolate for drizzling
- Tools: 8–10 small cups or jars (6–8 ounces each)
- Mixing bowls and electric mixer
- Rubber spatula and small spoon
- Piping bag (optional, for neat filling)
Instructions
- Make the crust: Stir cookie crumbs, melted butter, sugar, and a pinch of salt until the mixture looks like wet sand and holds together when pressed.
- Press into cups: Spoon 2–3 tablespoons of crust mixture into each cup. Press down firmly with the back of a spoon or a small flat-bottomed glass to create an even layer.
- Optional quick set: For a sturdier crust, bake the empty cups on a tray at 350°F (175°C) for 6–7 minutes, then cool. Or chill the crusts in the fridge for 15 minutes while you make the filling.
- Beat the cream cheese: In a large bowl, beat softened cream cheese on medium speed until smooth and fluffy, about 2 minutes. Scrape the bowl so there are no lumps.
- Add sugar and cocoa: Mix in the granulated sugar, cocoa powder, and salt until fully combined and silky.
- Blend in sour cream and heavy cream: Add the sour cream and heavy cream. Beat on low until smooth and thick, about 1 minute.
- Flavor and color: Add vanilla and lemon juice. Then add red gel food coloring a little at a time until you reach a deep, vibrant red. Gel works best—liquid coloring can water the mixture down.
- Fill the cups: Spoon or pipe the red velvet cheesecake mixture over the crusts, filling each cup nearly to the top. Tap the cups gently on the counter to release air bubbles.
- Chill to set: Cover and refrigerate for at least 4 hours, or overnight for the cleanest texture. The filling should be firm but creamy.
- Finish and serve: Top with whipped cream, a drizzle of melted white chocolate, sprinkles, or fresh raspberries. Serve chilled.
Printable Recipe Card
Want just the essential recipe details without scrolling through the article? Get our printable recipe card with just the ingredients and instructions.

Sarah is a café cook and weeknight–recipe expert who specializes in simple, and healthy-ish meals. She creates recipes packed with flavor, perfect for anyone who wants great food without spending hours in the kitchen.